Guides
Basics
About
Bello offers high-end interiors for staging your art or photography (referred to as "mockups"). All mockups include lighting and color adjustments to blend your art seamlessly into the room. Most of our mockups are fully adjustable, including custom frame sizes, position, color, and more.
What's Included
Purchasing a Bello mockup gives you an instant access link to open it in Studio, where you can upload your artwork, customize the presentation, and export your final image/video. If you prefer to work offline (Photoshop/Photopea), you can also download a PSD file from your account.
Using Studio vs. Photoshop
Most users open their mockups directly in Studio after purchasing—it runs entirely in your browser and is the easiest and fastest way to create professional mockups. If you prefer to work offline or need more advanced control, you can download PSD files from your account.
PSD files can be opened in Studio (free), Adobe Photoshop, Photopea (free), Canva, GIMP, or Procreate. We recommend using Studio, Photoshop, or Photopea. We do not recommend using Canva, GIMP, or Procreate, because those programs discard many of the effects included in our templates and yield a less-realistic result. Our templates are NOT supported by Affinity Designer.
Using our templates in Studio
Opening the template
In your account, click the "Open in Studio" button for your purchased mockup to open it in Studio . If you downloaded one of our PSD or BELLO files, you can also open it in Studio.
Inserting your art
Once the mockup is loaded, click on "Select Artwork" on the left-hand side to select artwork from your computer, and Studio will automatically insert it into the room in a custom-fitted frame.
Customizing the frame
After inserting your art, you can click on the frame to move/resize it. Hit the enter key to confirm your changes, or click the Confirm button in the transform bar at the top. Hit the escape key, or click Cancel, to cancel the transform.
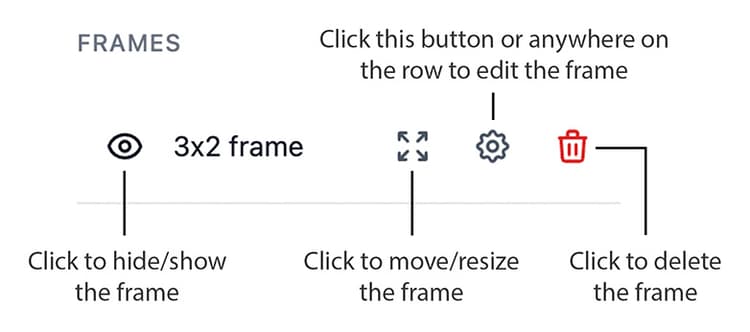
You will also see a list of frames on the left-hand side. You can hide/show the frame, transform it (move/resize), edit it, or delete it. You can also click on the row itself to edit the frame.
In the "Edit Frame" view, you can change your artwork, change the frame style, change the frame color or lighting, or add a custom matboard.

Panning and Zooming
You can use the buttons on the bottom-right corner to pan or zoom in/out. Or to pan, hold spacebar and click and drag. To zoom, hold alt (PC) or option (mac) and scroll.
Exporting
To export your final image, click on the Export button on the top right. It will export at highest resolution and in PNG format by default.